Revamp Your Style: How to Clean 2nd Hand Shoes Easily
Snagging a great pair of second-hand shoes can feel like striking gold, but the thrill often comes with a side of grime. I’ve been there, and I know that cleaning pre-loved kicks is key to making them truly yours. Whether it’s a vintage find or a gently worn gem, I’ll show you how to spruce them up in no time.
Assess the Condition of the Shoes
Before diving into the cleaning process, I always take a moment to carefully inspect the shoes for any signs of wear and tear. Evaluating the condition of second-hand shoes is crucial to determining the appropriate cleaning strategy. Not all shoes can be treated the same way, and some may require more delicate handling, especially if they’re made of sensitive materials or possess any vintage value.
When examining the shoes, I look for:
- Scuff marks
- Stains on the fabric or leather
- Worn outsoles
- Loose seams or stitching
- Any odors indicating mildew or bacteria
These factors greatly influence the cleaning agents and tools I’ll decide to use. For instance, leather shoes demand a different approach compared to canvas sneakers. Leather can be more sensitive to water and harsh chemicals, and may benefit from specialized cleaning products and conditioners. Meanwhile, canvas is generally more forgiving and can often withstand a gentle wash with mild soap and warm water.
Odor is another significant consideration. If the shoes smell musty or just unpleasant, I’ll opt for treatments that deodorize and not just clean the surface. Baking soda is a fantastic natural deodorizer that can work wonders on second-hand shoes, absorbing smells without damaging the material.
For the insoles, they can often be the most telling of a shoe’s history. If removable, I take them out, check their condition, and decide if they can be refreshed or if it’s best to replace them altogether. Insoles can bear the brunt of past wearers’ footfalls, so sometimes, a new pair of insoles is the key to making second-hand shoes feel like new.
Remove Loose Dirt and Debris
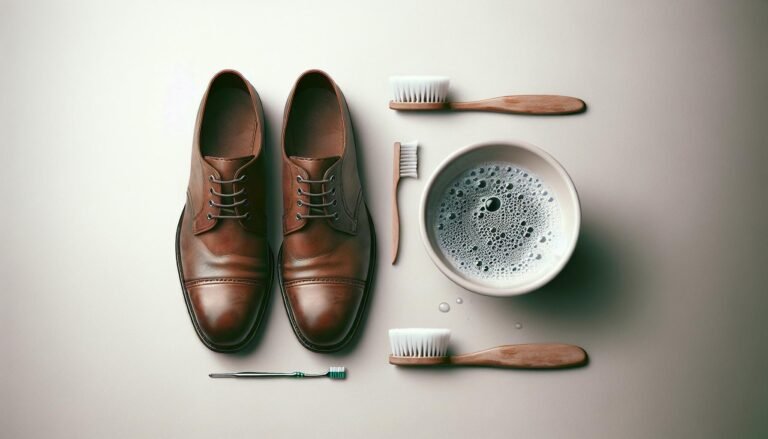
Before diving into the meticulous cleaning of second-hand shoes, it’s essential to start with the basics: removing loose dirt and debris. This preparatory step prevents any surface grit from scratching or further damaging the material during the deep cleaning process. I’ve found that a good shake or gentle tap of the shoes against each other can dislodge a surprising amount of dry dirt. For those stubborn particles caught in the crevices of the sole, a soft-bristled brush or an old toothbrush works wonders.
To ensure no nook or cranny is overlooked, I follow a structured approach:
- Begin with the soles, brushing away all traces of soil and pebbles.
- Progress to the sides and upper sections, where dust tends to accumulate.
- Address the laces separately by untying and removing them to access the tongue of the shoes.
In my experience, handling the laces on their own not only simplifies the cleaning but also enables them to be soaked or laundered if they are fabric-based. For materials like leather laces, a simple wipe-down with a damp cloth is typically sufficient.
Once the loose dirt is handled, I look over the shoes for any remaining debris that might require a bit more attention. A cotton swab dipped in warm soapy water is my go-to tool for tight spots – it’s gentle enough yet effective.
By completing this critical initial stage, your second-hand shoes will be ready for the deeper, more intricate cleaning methods that will bring them back to life. Whether they’re leather lows or canvas high-tops, this process ensures you’re starting your refurbishing journey on the right foot.
Pre-treat Stains
Before diving into the main cleaning routine, spot-cleaning stains is crucial, especially when you’re working with second-hand shoes that might have picked up various marks over time. Identifying the type of stain will guide you in choosing the right cleaning solution. Here’s how I tackle this step.
For organic stains like grass or food, I’ve found that a mixture of baking soda and water creates a paste that does wonders. Apply it gently on the stain and leave it to sit for about 30 minutes before wiping off. Ink and dye stains are trickier, but rubbing alcohol applied with a cotton ball can lift them away. Patience is key – don’t rub too vigorously as it could damage the shoe material.
Then there are the oil-based stains, such as grease or makeup. These can usually be treated with a dab of dish soap mixed with water. It’s essential to avoid using too much liquid on leather or suede, as it can cause lasting damage. Instead, apply the soap mixture with a soft-bristled brush in gentle circular motions and wipe clean with a damp cloth.
For sneakers or canvas shoes with particularly stubborn stains, I sometimes resort to using a specialized shoe cleaner designed for tough spots. Follow the product instructions closely, and always test on a small, inconspicuous area first.
Remember to tackle stains as soon as possible. The longer they sit, the harder they’ll be to remove. Between each treatment, allow the shoes to air-dry completely, which helps prevent the development of mold and unpleasant odors. Keep in mind, careful treatment during this stage sets you up for excellent results in the final deep clean.
Choose the Right Cleaning Method
When you’re looking at a pair of second-hand shoes, it’s crucial to determine the best cleaning method based on the shoe material. Different materials require different approaches for optimal results. Leather shoes, for instance, can’t be treated like canvas shoes—they need a gentler touch and specialized leather cleaners. Furthermore, don’t forget that suede demands a unique approach, often involving a special suede brush and eraser.
For shoes made with synthetic materials, a solution of warm water and mild detergent works wonders, making sure not to soak the shoes to prevent deterioration. With athletic shoes, you might be tempted to toss them in the washing machine, but this can harm their shape and structure. Instead, I prefer to use a soft-bristled brush for the soles and a microfiber cloth for the upper parts, giving them a careful hand wash.
Here’s a quick guide to help you match the shoe material with the right cleaning tools:
- Leather: Leather cleaner, soft cloth, and leather conditioner.
- Canvas: Soft brush, mild detergent, and warm water.
- Suede: Suede brush, eraser, and a special suede cleaner.
- Synthetic: Mild detergent, warm water, and a soft cloth or brush.
- Athletic shoes: Soft-bristled brush, microfiber cloth, and a mild cleaning solution.
Keep in mind that harsh chemicals or bleach can irreversibly damage most shoe materials. Therefore, always spot test your cleaning solution on a hidden area of the shoe before fully diving in. For instance, if you’re working with white canvas shoes, you’ll want to ensure that your chosen cleaner doesn’t discolor or leave behind any residue.
Another critical aspect is drying your second-hand shoes. Never put them near direct heat or in direct sunlight, as this can warp the material and fade the color. Instead, stuffing the shoes with paper towels or white tissue can help them maintain their shape and absorb moisture. Just remember to replace the stuffing regularly until the shoes are completely dry.
It’s this attention to detail in the cleaning process that can restore the former glory of your second-hand finds, turning them into a treasured part of your wardrobe. Whether you’re sprucing up a vintage pair of pumps or preparing a sporty set for your next run, knowing how to clean them correctly is the key to ensuring their longevity and your satisfaction.
Clean the Exterior of the Shoes
Once you’ve selected the appropriate cleaning method for your second-hand shoes’ material, it’s time to focus on the exterior. This is where the visual transformation really takes place. I start by gently brushing away loose dirt and debris from the surface. For leathers, I’ll use a soft cloth or a brush specifically designed for leather to avoid scratching the material. Canvas and other fabrics can handle a stiffer brush.
Sometimes, I encounter stubborn stains that seem daunting, but there’s often a simple solution. Baking soda and water make an excellent paste for white rubber soles, cutting through grime as if it’s butter. When it comes to suede, though, I’d opt for a suede eraser that lifts dirt without adding moisture.
For an even deeper clean, I make a mixture of warm water and a gentle detergent. Here’s how I do it:
- Dip a soft cloth or sponge into the mixture.
- Wring it out so it’s damp, not dripping.
- Gently wipe the exterior surfaces of the shoe.
It’s crucial to remember not to soak the shoes as this can cause damage, particularly to delicate materials such as suede or certain synthetics. Once I’ve finished wiping, I’ll pat the shoes with a dry towel to remove excess moisture.
While cleaning, I pay close attention to the care labels often found inside the tongue or along the interior sides. These labels provide essential information on dos and don’ts specific to the shoe materials. Ignoring these can lead to irreversible damage, so I always take the extra minute to consult them.
Throughout the process, it’s vital to work gently and methodically. Quick, harsh movements can create scuffing or other forms of wear. So I take my time, working with the shoe’s contours, ensuring that every inch gets the attention it deserves without being overly aggressive. After all, part of the appeal of second-hand shoes is their unique history and character—I aim to preserve that, not erase it.
Refresh the Insoles and Lining
Once the exterior of your second-hand shoes shines, it’s time to focus on the inside. No one wants the remnants of the previous owner’s footprints, literally or figuratively. So, refreshing the insoles and lining is a crucial step.
First, it’s important to remove the insoles, if possible. This allows for a much more effective clean. If they’re particularly worn or carry a noticeable odor, consider replacing them altogether. Replacement insoles are readily available and can provide not only a clean foundation but also enhanced comfort.
For insoles that can be cleaned, here’s a simple process:
- Mix a solution of warm water and a few drops of gentle detergent or shoe deodorizer.
- Using a soft brush, like a toothbrush, gently scrub the insoles to eliminate any dirt or stains.
- Wipe them down with a cloth dipped in clean water to remove any soap residue.
- Allow the insoles to air-dry completely before reinserting them into the shoes.
If the insoles are fixed, sprinkle baking soda inside the shoes and leave it overnight to absorb odors. The next day, vacuum up the baking soda or shake it out well.
Let’s address the lining. Using a cloth or sponge soaked in a mild detergent solution, carefully wipe the interior to remove any dirt or stains. Certain products are designed specifically for shoe interiors and can add a fresh scent while also fighting bacteria.
The key here is to be gentle to avoid damaging the material. Also, ensure that you’re only dampening the fabric, not soaking it. This minimizes drying time and prevents any potential water damage to the shoe’s structure.
For tough odors, a shoe deodorizing spray can work wonders. When applying, focus on the toe area and work to the heel, as that’s where bacteria often congregates.
Allowing your shoes to dry naturally is best, as direct heat can warp the shape and compromise the adhesive used in many shoes. If needed, stuff the shoes with newspaper to absorb moisture and help maintain their form while drying. Remember, care and patience are your best tools for reviving second-hand treasures.
Eliminate Odors
Even after a good scrub, second-hand shoes can harbor unpleasant odors, but I’ve got some tried-and-true methods to tackle them. The key is to address both the source of the odor and the shoe material.
To start, baking soda serves as a fantastic natural odor absorber. Sprinkle a generous amount inside each shoe and let it sit overnight. Baking soda doesn’t just mask smells; it neutralizes them, which is exactly what you need. In the morning, just tap out the powder, and you’ll notice a significant difference.
If the scent lingers, activated charcoal is another powerful ally in the fight against odors. You can get these in convenient pouches that slip right into your shoes. They work like a charm by pulling odors out of the shoes without leaving any residue. Plus, they’re reusable; just place them in the sun to rejuvenate their odor-absorbing properties.
Here’s a tip that might surprise you: freezing your shoes. It might sound odd, but cold temperatures can kill the bacteria causing the odor. Place the shoes in a sealable bag and leave them in the freezer overnight. Just make sure they’re completely dry before doing this to avoid any unwanted frost.
Last but not least, don’t underestimate the power of sunlight and fresh air. Sometimes all shoes need is a day out in the sun to freshen up. Ultraviolet rays can help sanitize the shoes and eliminate bacteria, thus reducing the odor naturally.
Remember, these methods are gentle enough to protect your shoes while they eradicate odors. Rotate through these options, or use them in combination, to keep your second-hand treasures smelling as good as new.
Dry and Condition the Shoes
Once you’ve tackled the odors in your pre-loved shoes, it’s time to move on to drying and conditioning them to ensure they’re fresh and ready for wear. Properly drying shoes is critical to prevent mold or mildew from developing, which can be a concern especially after a deep clean.
To start drying, I always fill the shoes with newspaper or a towel to absorb moisture from the inside out. I replace the newspaper or towel every few hours until the shoes are completely dry—this usually takes about 24 hours. It’s important to avoid direct heat sources, like a hairdryer or heater, as these can warp or damage the shoe material.
Leather shoes require additional care after they’re dry. I use a specifically designed leather conditioner to keep the material soft and prevent cracking. By applying a small amount of conditioner and gently working it into the leather, my second-hand shoes get a new lease on life with a touch of shine and rejuvenation.
For synthetic materials or canvas, I trust a protective spray to do the trick. These sprays help repel water and stains, keeping the shoes looking good for longer. I always test the spray on a small, less visible area first to ensure it won’t discolor or damage the shoes.
Here are a few steps I follow:
- Remove excess moisture: After cleaning, absorb as much moisture as possible.
- Air dry: Let the shoes air out in a well-ventilated area away from direct sunlight.
- Condition leather: Use leather conditioner on dry leather shoes to maintain their quality.
- Protective spray for synthetics and canvas: Apply to provide a barrier against future dirt and stains.
By taking care of drying and conditioning, you’re not only making your second-hand shoes comfortable but also extending their lifespan and keeping them looking their best.
Final Touches and Inspection
Once the shoes have been dried and conditioned properly, it’s time to focus on the final touches that’ll bring them to near-new condition. I usually start by inspecting the shoes for any missed spots or remaining stains. If any are found, I’ll do a targeted clean using a soft cloth and a mild cleaning solution specifically suited to the material of the shoe.
After ensuring the shoes are spotless, it’s essential to revitalize the color and texture. For suede and nubuck shoes, a specialized suede brush can help restore their classic, velvety appearance. For other materials, a gentle buffing with a clean, soft cloth can enhance shine and color vibrancy.
It’s important not to forget about the laces. They can often look the most worn and can detract from the overall appearance if not addressed. I prefer to remove laces and wash them separately. If they’re beyond redemption, replacing shoe laces is a cost-effective way to freshen up the look of second-hand shoes.
Additionally, shoe insoles sometimes require attention. If the original insoles display signs of wear or don’t fit quite right, I find that investing in new insoles can improve both the comfort and hygiene of the shoes.
Lastly, I pay close attention to the soles. Sole edges can often collect dirt and scuff marks that are easily overlooked. A magic eraser or dedicated shoe cleaner can work wonders here, making the soles appear clean and well-maintained.
Through these final touches and a detailed inspection, second-hand shoes get the lift they need to look their best. It’s all about giving them a little extra care and attention to detail that makes all the difference in rejuvenating the shoes’ overall appearance. With these efforts, they’re more than ready to step out into the world once again looking polished and cared for.
Conclusion
I’ve walked you through the steps to make your second-hand shoes look and feel almost like new. Remember, a thorough inspection for missed spots and a targeted clean can make a world of difference. It’s all about the details—revitalizing the color, buffing the texture, and not overlooking the laces. Consider investing in new insoles for that extra comfort and hygiene boost. And don’t forget, a clean and well-maintained sole rounds off the shoe’s transformation. With these tips, you’re now ready to step out in style with your refreshed kicks. Happy strutting!