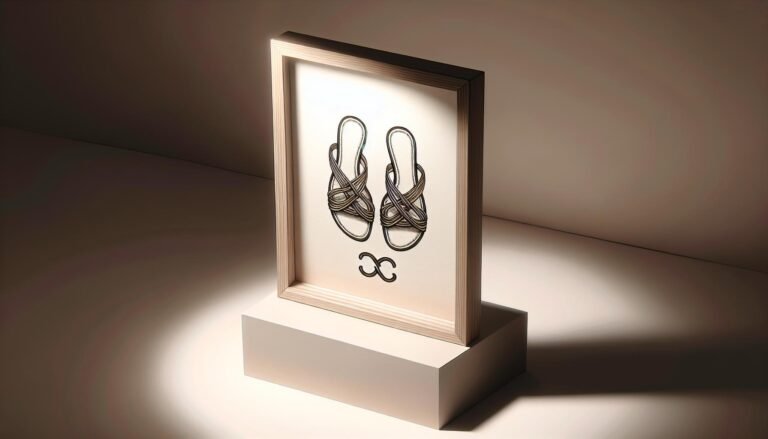
Wait Time After Pedicure Before Wearing Shoes? Get Tips Here
Ever found yourself sitting at the edge of your pedicurist’s chair, wondering when it’s safe to slip back into your shoes without smudging that perfect polish? I’ve been there, and let’s just say, timing is everything. Getting a pedicure is a treat for your feet, but the anticipation to show off those glossy toes can lead to a hasty exit—and a ruined finish.
I’ll give you the lowdown on the ideal wait time before you can confidently slide into your footwear. It’s all about patience and knowing just the right moment to protect your pedi investment. Stick around, and I’ll share my top tips to keep your toes looking top-notch, no matter which shoes you’re itching to wear.
Why Timing Matters After a Pedicure
When I get a pedicure, one of the most critical factors that I consider is the drying time of the nail polish. Drying time isn’t just the period it takes for the polish to be touch-dry, but rather the time it needs to completely harden. Fresh polish may seem dry within minutes, but it’s often not fully set. Sitting back and granting your toes the time they need to dry fully is a small investment that pays off in keeping your pedicure pristine.
I’ve learned that the type of polish plays a significant role in the drying process. Standard nail polish typically takes about 24 hours to completely harden, whereas gel polish, cured under UV or LED light, hardens instantly. Still, even with gel polish, a little extra time before sliding into shoes can prevent any accidental dents or smudges that might occur from the pressure.
Here’s why good timing can make or break your pedicure:
- Avoids Smudges: Walking out of the spa and cramming your feet into shoes can turn your perfectly applied polish into a smudged mess. Even slight pressure on tacky polish can cause marks that are hard to fix.
- Prevents Dents: Even in open-toed shoes, there’s a chance your nail polish gets dented if it hasn’t fully cured. Dents not only look unsightly but they’re a sign your polish isn’t set to last.
- Ensures Longevity: By giving your polish the time to dry completely, you’re essentially sealing in the color and finish, ensuring your pedicure stands up to the rigors of daily life.
Understandably, it’s not always possible to set aside large blocks of time for a pedicure to dry. That’s why I’ve picked up a few tricks to accelerate the drying process without compromising the quality of the pedicure. For instance, quick-dry topcoats or nail drying sprays can come in handy, though they should be used correctly to ensure they don’t cause the polish to shrink or crack. Even then, I’ve found it’s better to err on the side of caution and give your nails a little extra time beyond what these products promise.
The Dangers of Putting on Shoes Too Soon
After getting a pedicure, it’s tempting to slide into a pair of shoes quickly and go about your day. However, putting on shoes too soon after a pedicure can lead to several issues that compromise the fresh look and feel of your nails.
When you’re dealing with wet or even semi-hardened nail polish, the confines of a shoe can cause smudging, denting, and even more severe damage to your pedicure. Shoes often exert pressure on the nails, and this can ruin the smooth finish you’re striving for. Imagine stepping into sneakers and finding the pattern of the fabric pressed into your once-flawless polish; that’s certainly not the outcome anyone would want.
Beyond just the aesthetic damage, shoes can also cause lasting indentations that don’t simply buff out. These indentations can trap dirt and debris, leading to nails that look poorly maintained and can even become breeding grounds for bacteria. It’s not just closed-toed shoes that can cause issues—sandals with straps can also leave unsightly marks and depressions on your nails if they’re strapped on too soon.
Even if quick-dry products claim to reduce waiting time, they’re not foolproof. Patience’s key — rushing the process can mean repeating it much sooner than necessary. That’s why experts recommend waiting a full hour before slipping on open-toe shoes, and if you’re considering closed-toe footwear, you should aim for even longer—up to a full 24 hours if possible. This ensures your polish has enough time to set fully and decreases the chances of any mishaps.
Remember, the longer you wait to don your shoes, the more likely it is that your pedicure will stay pristine. For those on the go, consider flip-flops or special pedicure sandals designed with ample space to avoid any contact with the nail until it’s sufficiently hardened.
By recognizing the dangers of wearing shoes too soon, you can ensure that your pedicure remains immaculate and long-lasting. Keep in mind that a bit of wait time can save you from a repeat trip to the salon and extend the life of your beautiful pedicure.
How Long Should You Wait after a Pedicure?
After a relaxing pedicure session, it’s tempting to slip your feet into stylish shoes and showcase your freshly painted toes. However, patience is key in preserving that flawless finish. Nail polish may seem dry to the touch within minutes, but it undergoes a curing process that can take much longer. For a standard polish, the rule of thumb I’ve learned through countless salon visits and expert advice is to wait at least one hour before donning open-toe shoes. But when it comes to closed-toe footwear, patience needs to stretch further.
With closed-toe shoes, there’s an increased risk of smudging due to the pressure and friction against the nail. Therefore, the waiting period needs to be extended to prevent any damage. The professional consensus is that waiting up to 24 hours ensures the polish is completely set and hard. This can feel like a test of endurance, but the results are worth it.
To manage this waiting period, consider timing your pedicures accordingly. Plan them on days when you can leisurely wait for your nails to dry, or even better, when you have the luxury of going barefoot or wearing open footwear for the rest of the day. If you’re getting a pedicure in preparation for an upcoming event, aim to have it at least a day in advance.
If you must put on shoes after a pedicure, pedicure sandals, specially designed to provide minimal contact with the nails, offer a solution. Alternatively, flip-flops are a go-to for many after nail treatments. Avoid the urge to cover up with tight socks or stockings as these can stick to the polish and cause imperfections.
Here’s a straightforward breakdown of the waiting times post-pedicure based on the type of footwear:
| Footwear Type | Minimum Waiting Time |
|---|---|
| Open-toe Shoes | At least 1 hour |
| Closed-toe Shoes | Up to 24 hours |
| Pedicure Sandals | Immediate |
Remember, these are minimum times; whenever possible, allow for extra drying time to ensure your pedicure remains pristine.
Factors that Affect the Drying Time
When you’re anticipating sliding into your favorite pair of shoes after a pedicure, it’s crucial to consider the various factors that significantly influence the drying time of your nail polish. Understanding these can save you from the frustration of a ruined finish.
Type of Nail Polish: The formula of the polish plays a significant role. Quick-dry polishes can set faster than traditional formulas, whereas gel polishes require curing under a UV or LED lamp to become completely dry.
Application Technique: Thicker layers of polish will invariably take longer to dry. I always recommend applying thin, even coats and allowing each layer to dry before adding the next. This approach helps speed up the overall drying process.
Humidity and Temperature: Environmental conditions, such as humidity and temperature, can affect drying time substantially. Nail polish dries best in a cool, dry environment because humidity can prolong the drying process, so consider the climate before planning your pedi.
Ventilation: Good airflow helps nail polish dry more efficiently. If you’re getting a pedicure at a salon, ensure they have adequate ventilation. At home, a fan can assist in speeding up the drying time but avoid using heat as it can cause smudging.
Top Coat and Drying Agents: Using a high-quality top coat can protect your polish and expedite drying. There are also drying oils and sprays available that can reduce wait times. However, even with these aids, it’s still important to give your nails sufficient time to set.
Keep these factors in mind the next time you plan a pedicure to ensure that your nails have the best chance to dry flawlessly. Properly dried nails remain beautiful longer, maintaining that fresh-from-the-salon look that we all cherish. And remember, patience is the secret ingredient to pristine nails.
Tips to Speed up the Drying Process
When you’re fresh out of a pedicure session, the last thing you want is to ruin your perfect polish by slipping on shoes too soon. To mitigate this, I’ve picked up several tricks over the years to speed up the drying time and they’ve been game changers. Let’s dive into these quick-dry methods so you can strut in your favorite footwear without delay.
Quick-drying top coats are a must-have in your nail care arsenal. They’re specially formulated to shorten drying time and often provide extra gloss to your pedicure. Just a thin layer over your color can make a significant difference. Remember, it’s not just about applying it, but also about using the right amount; too much can actually prolong drying.
Next up, cold water soaks. It may sound counterintuitive, but dipping your toes in cold water post-pedication can help firm up nail polish. I usually wait at least a minute or two after the final coat before gently placing my feet in a bowl of icy water for around three minutes.
For those in a rush, hair dryers come in handy. Using your dryer on the cool setting, quickly pass over your nails in a side-to-side motion. Heat actually keeps the polish from hardening, so maintain a cooler temperature to effectively firm up the polish.
Here’s a pro tip: thin layers. While it’s tempting to slather on thick coats for opaque color, this extends drying time enormously. Instead, opt for multiple thin coats, allowing each to dry somewhat before applying the next. The result? Faultless coverage that dries more quickly than you’d expect.
Lastly, drying drops and sprays specifically designed for nail polish are readily available. Crafted with ingredients that reduce drying time, these products can be applied directly after your top coat. Besides speeding up the process, they often contain oils that moisturize the cuticles and enhance the overall appearance of your pedicure.
Using these strategies, I’ve managed to avoid the dreaded smudge many a time. My advice is to try a combination of these tips; you might just discover the perfect approach for nails that are ready for shoes in no time.
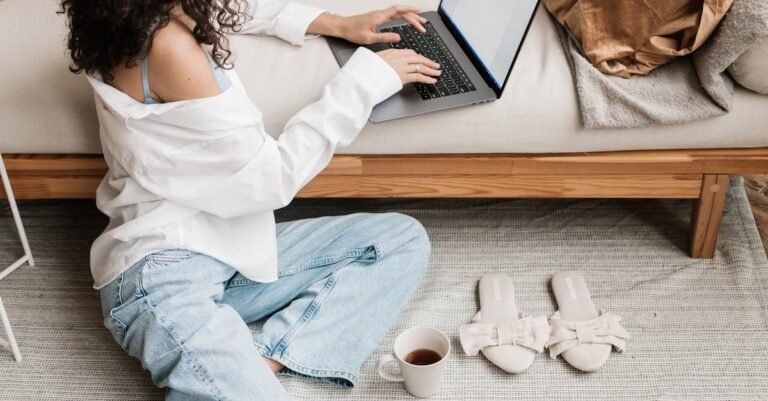
The Best Shoe Options for Immediately After a Pedicure
When it comes to picking footwear right after a pedicure, the goal is to avoid smudging freshly painted nails. Flip-flops are often the go-to choice as they allow your nails to remain untouched and can be slipped on without smearing your polish. If it’s chilly out or you’re not keen on flip-flops, open-toe sandals offer another safe bet. They’re not only stylish but practical, allowing for ample airflow and avoiding direct contact with your nails.
For occasions when more formal attire is required shortly after a pedicure, some brands offer peep-toe shoes which can also be an excellent compromise. These protect most of your foot while still sparing your nail polish from harm. Always select shoes with a soft lining to ensure they’re gentle on your toes.
A less common but effective option is pedicure socks. Specially designed with a separated big toe, these socks permit most of your nail polish to dry perfectly while keeping your feet warm. Here are a few practical footwear options post-pedicure:
- Flip-flops or slides
- Open-toe sandals
- Peep-toe flats or heels
- Pedicure socks with any open-front shoe
Before slipping into any shoe, always do a quick dryness test to ensure your nails are set enough that they won’t dent or smudge. Even with open-toed shoes, minimal friction is key to maintaining that pristine finish. Remember to look for light materials and loose fits as they are less likely to exert pressure on your toes.
Footwear with adjustable straps can be particularly beneficial as they allow you to customize the fit, reducing the risk of accidental smudges. Material like soft leather or fabric will not only protect your pedicure but also provide comfort for freshly pampered feet.
Ultimately, no matter which shoe you choose, it’s imperative to give your nails adequate time to dry. Utilizing earlier tips from the article, like quick-drying sprays and thin polish application, will prepare you to step out sooner with confidence. Consider these aspects when selecting post-pedicure footwear, and step out with style and smudge-free nails.
How to Protect Your Pedicure When Wearing Shoes
After investing time and resources into achieving the perfect pedicure, it’s natural to want to maintain its pristine condition. Protecting a pedicure when you need to slip on shoes isn’t just about waiting a sufficient amount of time; strategic measures can make all the difference. I’ll walk you through some key strategies to keep your toenails looking fabulous, even when it’s time to step back into your footwear.
Firstly, silicone toe separators are an excellent tool to safeguard your pedicure. These flexible, comfortable separators can be worn inside your shoes, providing a barrier that prevents smudging or chipping.
Additionally, choosing the right kind of socks can contribute significantly to pedicure protection. Opt for seamless socks made from breathable fabric. The lack of seams reduces friction and pressure on your toenails, while breathable material minimizes moisture that can cause polish to soften and become more vulnerable to damage.
Here’s a quick rundown of key steps to follow:
- Ensure your nail polish is dry to the touch.
- Use silicone toe separators or cushioned toe caps.
- Select seamless and breathable socks.
- Choose shoes with a roomy toe box to avoid pressure.
Another method I’ve found helpful is applying a layer of clear protective polish over the colored coat. This not only adds an extra shield against knocks and scrapes but also keeps the shine on point. Make it a habit to carry a small bottle with you for quick touch-ups if needed.
And don’t forget about choosing the right shoes. As noted, open-toe, peep-toe, and adjustable strap shoes are preferred immediately after a pedicure for their minimal contact with the polish. But if you must wear closed-toe shoes, ensure they’re loose fitting and made from soft materials that won’t press too firmly against your nails. Even better, pick footwear specifically designed with extra space in the toe area; such shoes are often marketed as “pedicure-friendly.”
In between wearing shoes, it’s clever to occasionally allow your feet to breathe. Going barefoot at home or slipping into open sandals gives your toenails a break from the enclosed environment, which helps in maintaining the integrity of your pedicure.
Remember, it’s not just the drying time that matters—taking ongoing preventive measures plays an essential role in extending the life and beauty of your pedicure.
Conclusion
I’ve shared my best tips to ensure you don’t ruin that fresh pedicure with your footwear choices. Remember, it’s all about giving your toes the space and protection they need to keep that polish pristine. Whether you’re slipping into sandals or need to opt for closed-toe shoes, there’s always a way to safeguard your pedicure. Stick to these strategies and you’ll enjoy beautiful, long-lasting results every time. Here’s to stepping out in style and confidence, without compromising on your pedicure’s perfection!